Generate Documents in Bulk with a Dataset
Turn each row of a spreadsheet into one document, so you can generate many documents at once from a list of people or records.
When to use this
This is a good fit for documents like certificates or payslips — same format, different values per person — that you need to generate in bulk from a list. You can generate up to 1,000 documents at a time.
1. Upload a template
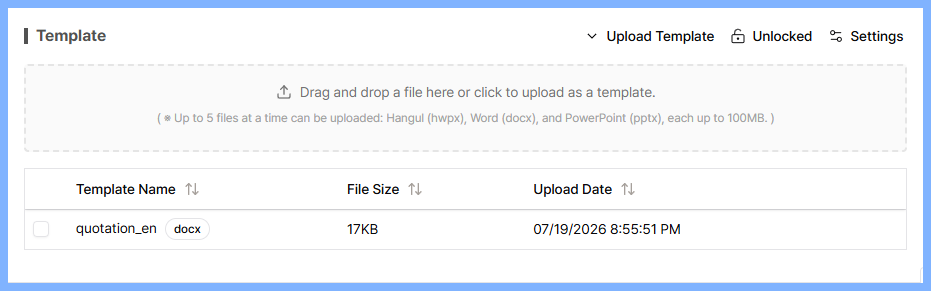
Upload a Word (docx), PowerPoint (pptx), or Hangul (hwpx) file using the "Upload Template" area near the top of the project detail screen. Once uploaded, the variables inside the file are detected automatically (see Template Variable Syntax if you're not sure about the syntax).
2. Prepare your dataset file
Prepare an Excel file (xls or xlsx). Each row corresponds to one document, and the column headers correspond to your template's variable names. If a header matches a variable name exactly, it's mapped automatically in the next step.
If your template has a repeating section — like a list of line items — you'll also need a separate sub-dataset file for that repeating section. The sub-dataset can be a different file from the main dataset, or a different sheet within the same file.
The Excel file itself is never uploaded to the server — only the column information from the header row you select is stored.
3. Add the dataset
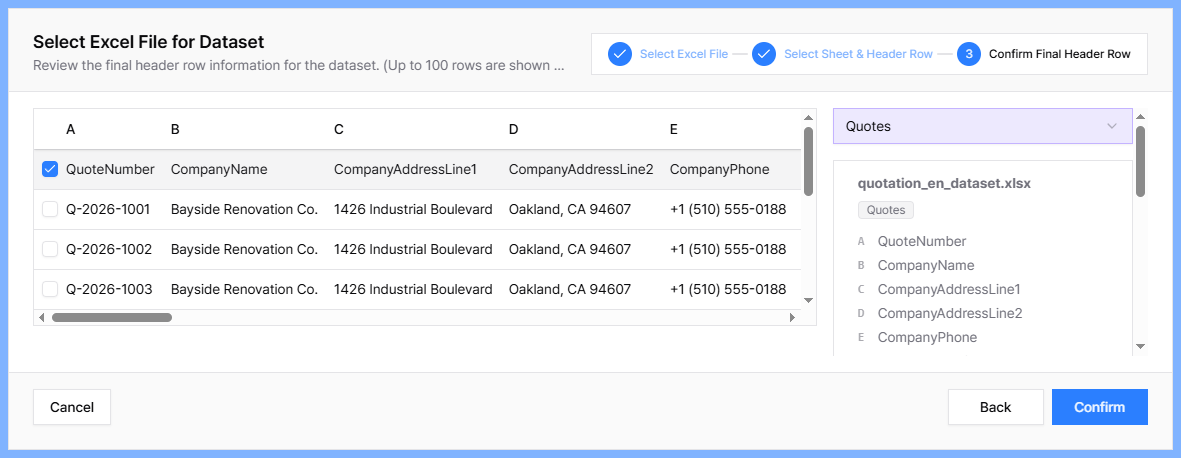
Select "Generate documents in bulk with a dataset" from the tab at the top, then click "Add Dataset" to open the 3-step wizard.
- Select Excel file: Choose the Excel file to use as your dataset from your computer.
- Select sheet & header row: Choose which row to use as the column header. If the file has multiple sheets, pick the one you want on the right.
- Confirm final header row: Review the header info that will actually be used and finish.
💡 If your template has a repeating section: linking a sub-dataset
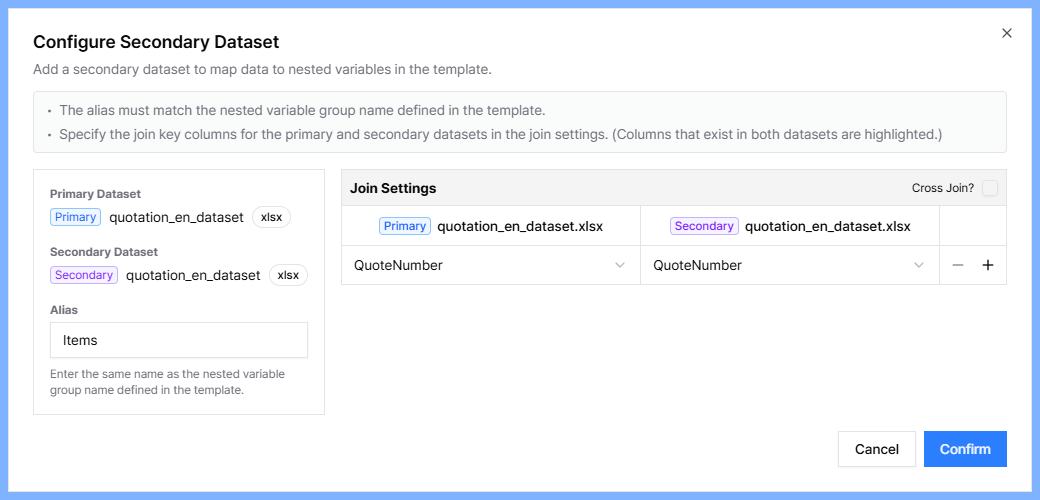
If your template has a repeating section — like line items — you'll need to add the dataset twice. Using the quotation sample (quotation_en_dataset.xlsx) as an example:
- Click "Add Dataset", select the file, and choose "Quotes" from the sheet list — this registers it as the main dataset.
- Click "Add Dataset" again, select the same file, and this time choose "Items" from the sheet list — this registers it as the sub-dataset. Once added, "Main"/"Sub" badges appear before each file name, and a "Sub-Dataset Settings" link appears next to the sub-dataset's file name.
- Click "Sub-Dataset Settings" to open the settings dialog.
- In the Alias field, enter a value that exactly matches the name of the repeating section in your template — in this example, "Items".
- In Join Settings, select an identifier column that exists in both the main and sub datasets — in this example, "QuoteNumber". An identifier column is one that can uniquely identify a data row; if a single column isn't enough, you can combine multiple columns instead.
Once linked, rows in the sub-dataset that share the same "QuoteNumber" are grouped together as the repeating cards for that quote.
4. Check variable mapping
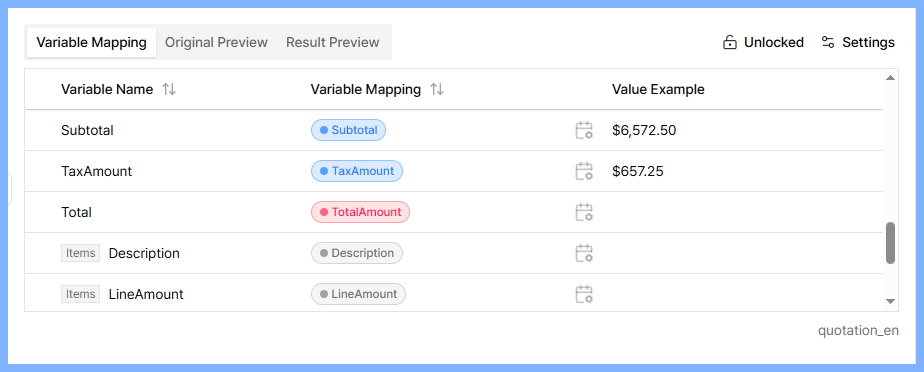
Selecting a template from the list shows the "Variable Mapping" tab on the right. Each variable's mapping status is shown with a color.
- Gray: no dataset connected yet, so mapping can't be checked
- Blue: successfully mapped to a dataset column
- Red: not mapped, or there's an error with the mapping
Variables are mapped automatically when their name matches a dataset column name exactly. If the names differ, click the mapping value to manually choose which column to connect. The "Sample Value" column shows a preview of what will actually be filled in.
You can also check "Original Preview" / "Result Preview" in the same tab group to see how values actually appear in the document.
5. Generate many documents at once
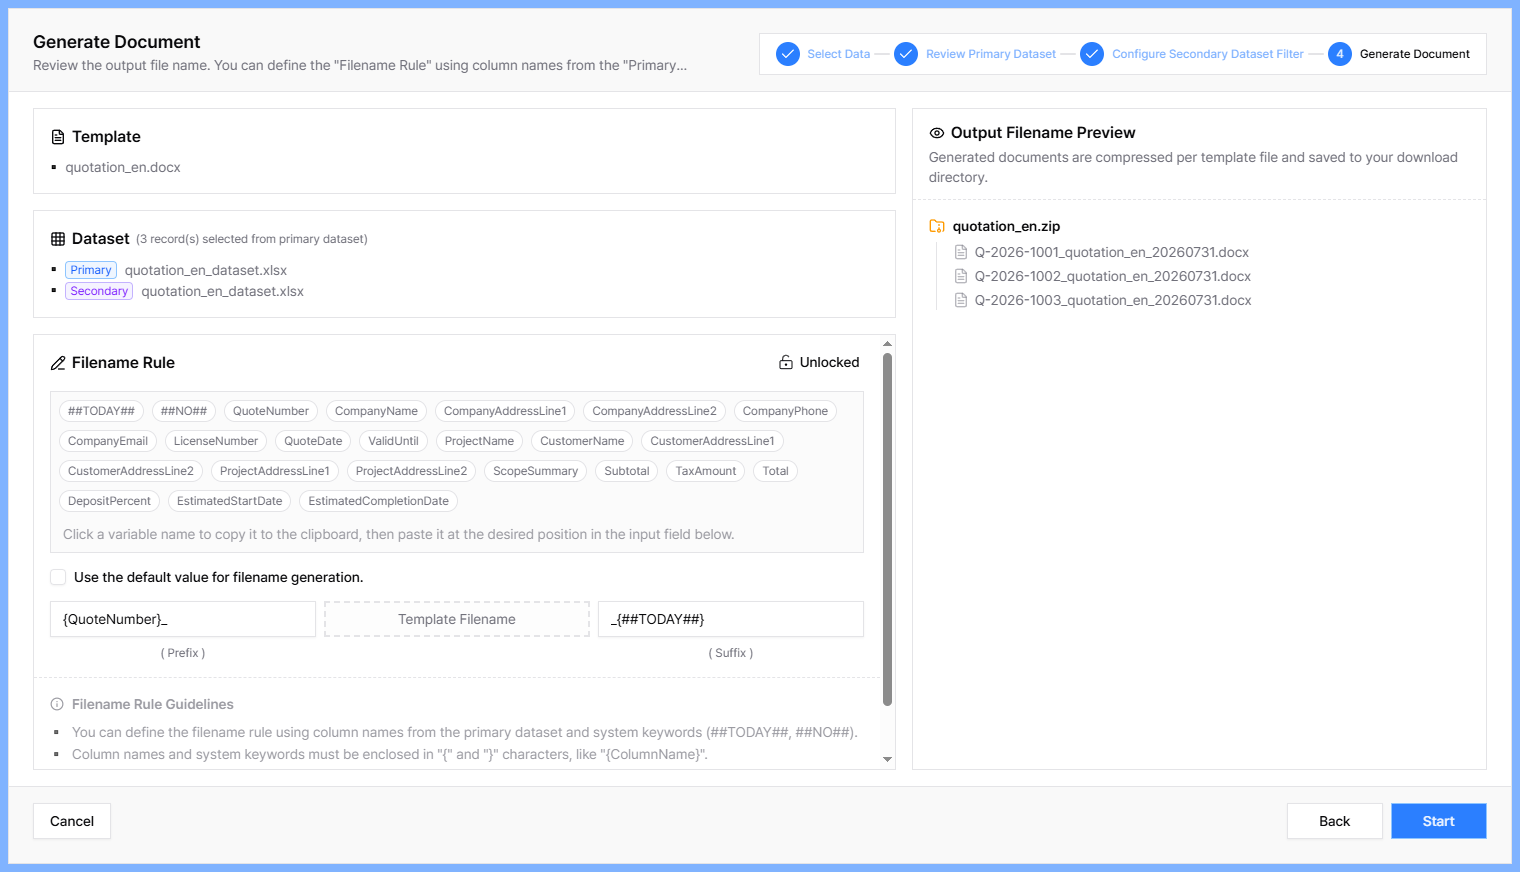
Click "Generate Document" at the top of the screen to open the 4-step wizard.
- Select data: Choose which rows to generate documents from in the main dataset (up to 1,000).
- Confirm main dataset data: Double-check your selection and deselect any rows if needed.
- Set sub-dataset filter: If there's a sub-dataset, you can filter it down to only the rows that match a condition.
- Generate document: Review the file names that will be generated. You can define a file-naming rule using the main dataset's column names. Click "Start" to begin generation — once complete, the files are saved as a zip archive in your downloads folder.