Generate One Document Quickly with a Form
Fill in on-screen fields directly to generate a single document quickly — no spreadsheet dataset required.
When to use this
This is a good fit when you need to generate a document — a single contract, a power of attorney — whose values differ a bit each time. As you type, the preview on the right updates immediately so you can see the result right away.
1. Upload a template
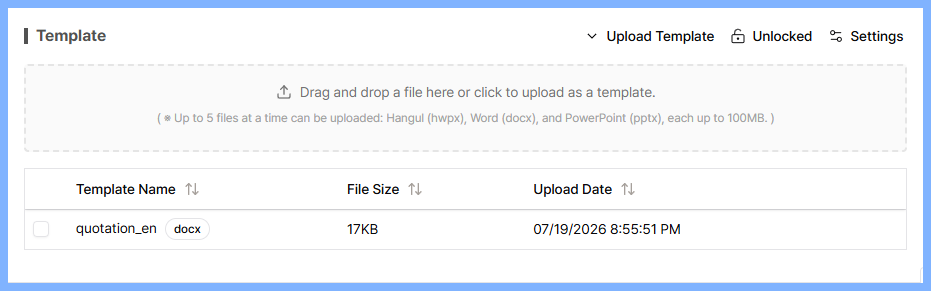
Drag and drop a file onto the "Upload Template" area near the top of the project detail screen, or click to select one. Word (docx), PowerPoint (pptx), and Hangul (hwpx) files are supported, up to 5 files at once. Once uploaded, the variables inside the file are detected automatically (see Template Variable Syntax if you're not sure about the syntax).
2. Fill in values
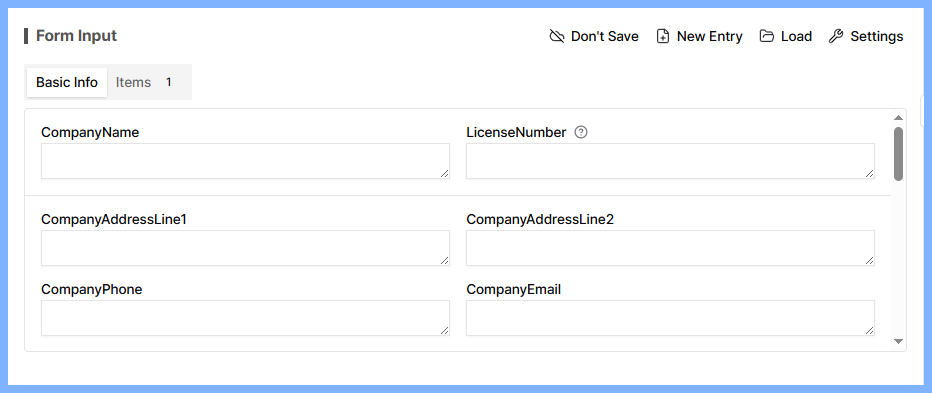
Select "Generate one document quickly with a form" from the tab at the top, then pick the template you want to fill in from the template list — input fields for its variables will appear in the "Form Input" panel on the left.
- Variables that don't belong to any group appear under the "Basic Info" tab.
- Variables marked as a repeating section appear as cards under their own tab, named after the group. Each card represents one repeated row; use "Add Item" to add more cards.
- If you see a question-mark icon next to a variable's label, the template's author left a note about it — hover over it to read the note.
3. Reorder fields and set the filename rule
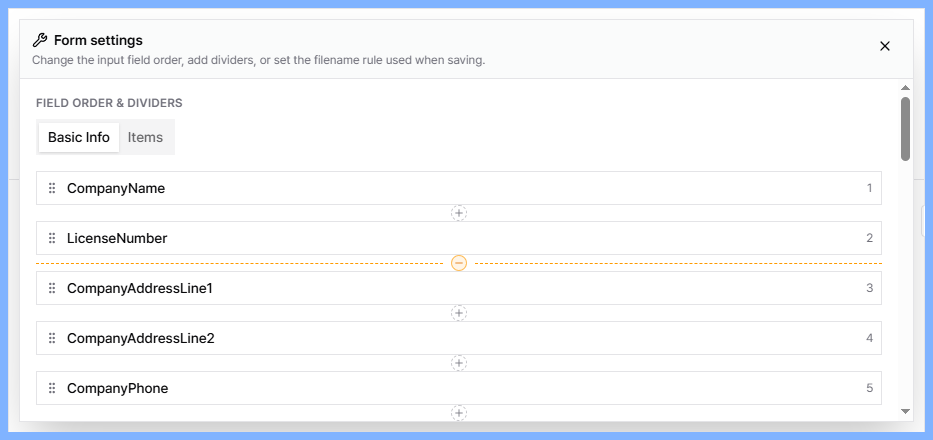
Click the "Settings" button at the top of the "Form Input" panel to open the "Form settings" panel.
- Field order & dividers: Within each tab (Basic Info or a repeating group), drag and drop fields to reorder them. Click the round button between fields to add or remove a divider. Order and divider changes are saved immediately as you make them.
- Filename rule: Sets the filename format used when saving or generating the document. Click a variable name or "##TODAY##" (replaced with the creation date) to copy it to your clipboard, then paste it into the prefix/suffix field to build the format you want. Checking "Use default format" applies the default rule (creation date appended as a suffix). Characters not allowed in filenames are removed automatically, and this rule is applied independently from the filename rule used in "Generate documents in bulk with a dataset" mode. The filename rule is saved when you close the settings panel.
4. Check the preview
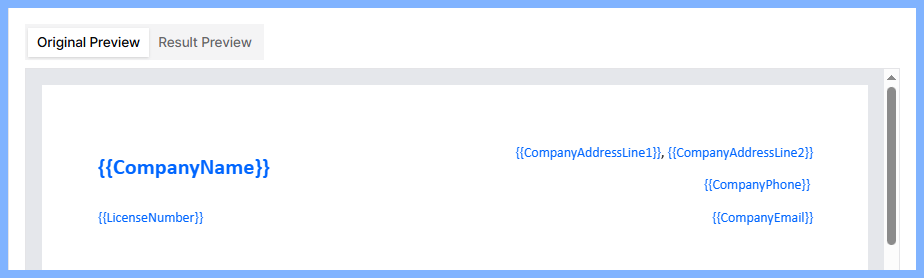
The panel on the right lets you switch between "Original Preview" and "Result Preview". Original Preview shows the template as-is, before any values are filled in; Result Preview shows what the document looks like with your current input, updating live as you type.
For documents with a lot of pages, the preview stops re-rendering automatically on every keystroke and only updates when you click the "Refresh" button at the top.
5. Save your work and load it again later
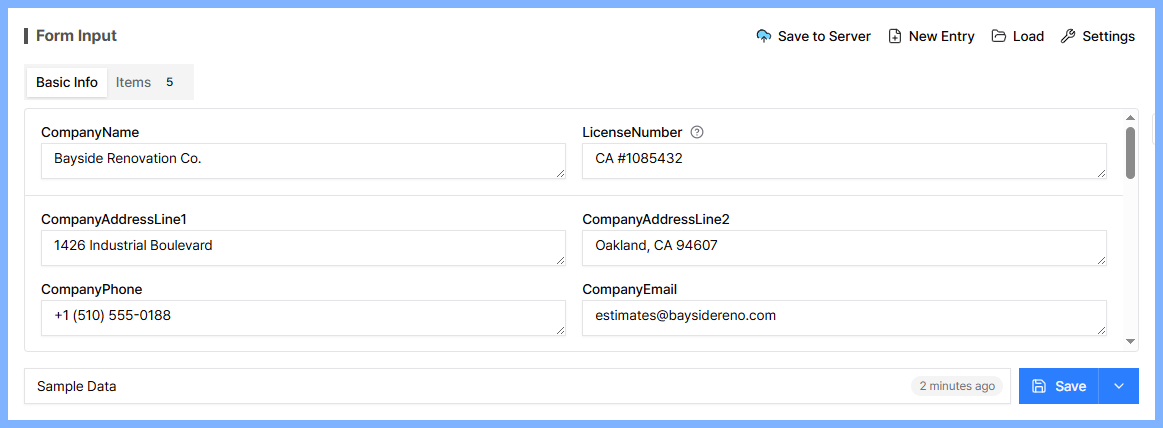
You can save your input values to the server and load them again later. This requires a workspace admin to switch the save location to "Save to Server" (via the "Not Saved" / "Save to Server" toggle icon). Once enabled, a save toolbar appears at the bottom of the screen.
- You can add a memo to help you find this entry later.
- Clicking "Save" saves the current values and shows the last-saved time. If you load a previously saved entry, edit it, and click "Save" again, it updates the same entry rather than creating a new one.
- To save the current values as a brand-new entry instead, use "Save as New".
- Use "Load" to browse previously saved entries and bring one back into the form.
6. Print or generate the document

To do a quick paper check of what you're working on, use the "Print" button in the preview area. Keep in mind that the print preview is a quick reference — actual pagination and styling may differ slightly from the generated document.
Once you're done filling in values, click "Generate Document" at the top of the screen to produce and download the actual document file.